Make the overlay yours: position, size and fields
An overlay always sits on top of something: a sky, a face, a horizon. That’s why PhotoView lets you decide where the metadata overlay sits, how big it is, what it looks like and what it shows. You can change its corner and size right on the photo, or in Settings under “Metadata”, where you’ll also find everything else. How to show and hide the overlay is covered in One tap to see how a photo was made. This post is about making it yours.
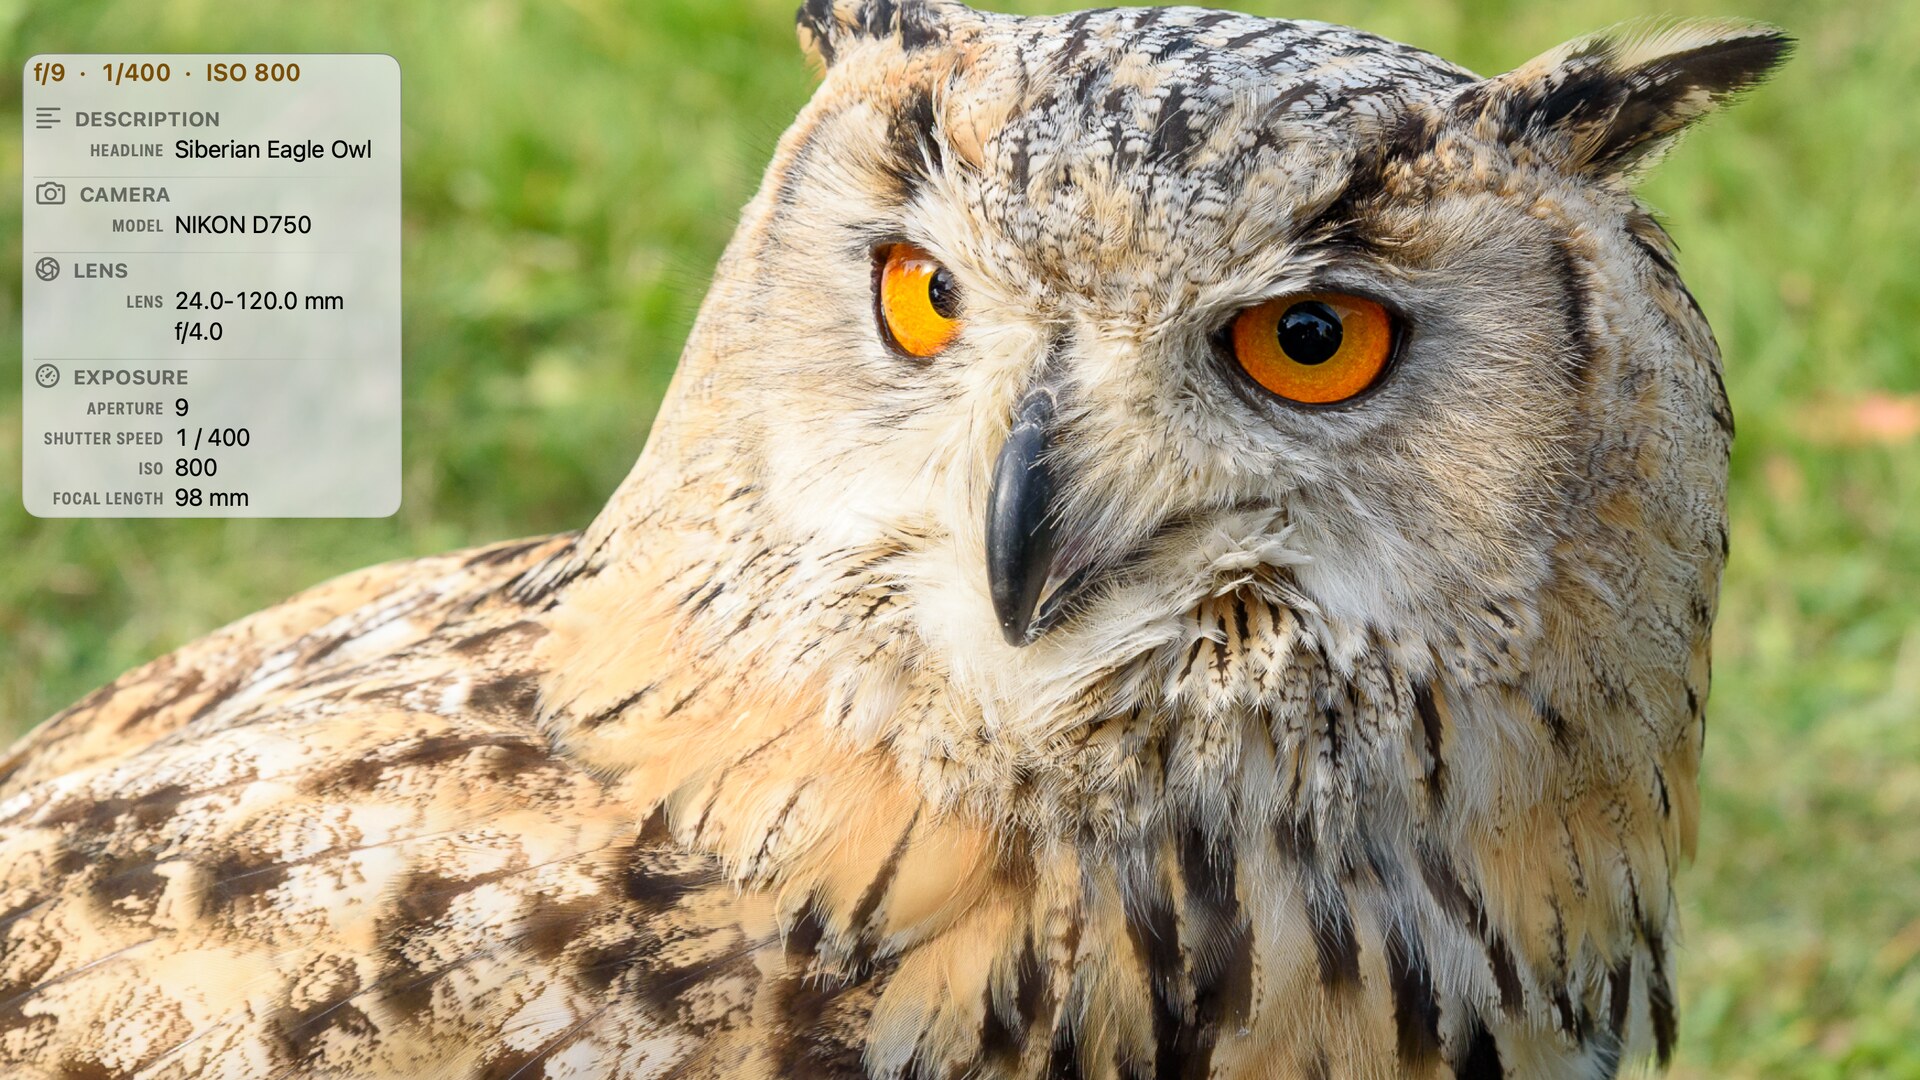
The right corner
Touch and hold the overlay and drag it into one of the four corners. As your finger nears a corner, the overlay snaps into place, with light haptic feedback on iPhone and a brief highlight on every device. Let go and it stays there, and the next photo keeps the overlay in that corner too. If your subject is in the bottom right, where the overlay starts out, you can drag it to the top left, for example, in one move.
You’ll find the same choice in Settings ▸ Metadata ▸ Overlay ▸ “Position”: Top left, Top right, Bottom left or Bottom right.
Size and font
Pinch the overlay open or closed with two fingers to change its size. You can choose Small, Medium or Large. On the Mac, the sizes follow the window: make the window larger, and the overlay grows with it, up to a set maximum.
When the overlay is large enough, a line of its own at the top shows aperture, shutter speed and ISO (provided you haven’t switched those three fields off). If more fields are switched on than fit into the overlay, you can scroll.
The same section of Settings has two more options:
- “Font size” sets the text to Small, Medium or Large. The text never gets larger than the overlay itself: only a large overlay shows the large font. More on this in What’s new in PhotoView 1.0.1.
- “Minimal width” makes the overlay only as wide as the widest field it currently shows. It changes its width in fixed steps, so its edge doesn’t shift a little with every photo as you browse. That pays off when you have only a few short fields switched on.
The background
Under “Background” you choose what sits behind the text. “Solid” is the default and keeps the metadata readable over any photo. “Liquid Glass” uses the system’s translucent material and looks more understated.
With “Solid”, you also set “Color” and “Opacity”, the opacity between 60% and 100%. The “Automatic” color makes sure the overlay stands out from the photo: a light photo gets a dark overlay, a dark photo a light one. With “Custom” you pick a color of your own, and PhotoView chooses a text color that stays readable on it.
If you’ve turned on Reduce Transparency or Increase Contrast in your device’s accessibility settings, the overlay always stays solid and fully opaque.
The fields
You choose what the overlay shows in Settings ▸ Metadata ▸ “Customize metadata fields”. The Metadata Fields screen sorts more than 200 fields into groups, from Description to Camera and Exposure to XMP. Three ways get you there quickly:
- Search: type part of a field name, such as “focal”, and the list shows only the matches, across all groups.
- Whole groups: the “All” switch next to a group heading turns the whole group on or off, even when it’s collapsed.
- Everything at once: “Select all fields”, “Deselect all fields” and “Reset fields to defaults” act on the whole list.
A field only appears when the photo has a value for it. So a screenshot doesn’t get empty rows for lens and focal length.
A selection for every situation
What you want to see depends on what you’re doing. Instead of switching fields on and off every time, save a selection as a metadata preset: switch on the fields you want and choose “Save as new preset…”. In the viewer, you then switch presets with the “Metadata preset” button in the toolbar.
“Standard” and “All fields” come with PhotoView; your own presets are part of PhotoView Pro. How to manage them is covered in What’s new in PhotoView 1.0.2.
When the overlay appears
On iPhone and iPad, “A tap shows” in Settings ▸ Metadata ▸ More sets what a tap on the open photo brings up. “In steps” is the default: first the toolbar, then the overlay as well, then just the photo. “Everything” switches between the photo alone and the photo with toolbar and overlay, and the viewer opens with the photo alone. In the same section, “Show seconds” adds seconds to the time, handy for burst shots.
On the Mac
On the Mac, you drag the overlay into a corner with the mouse button held down and change its size by pinching on the trackpad. A mouse works too: move the pointer over the overlay, and a small handle appears in the corner that faces the middle of the window. Drag it toward the middle of the window to enlarge the overlay, and back to shrink it. Right-clicking the overlay opens a menu with the three sizes and the four corners.
If you’d rather keep the photo completely clear, turn on “Show metadata in a separate window” in Settings under “Metadata”. Then ⌘I opens a window of its own with the same fields, which follows along as you browse and fits nicely next to the main window.
Set it once, take it everywhere
PhotoView saves your changes right away. With “Sync settings” in Settings ▸ General ▸ iCloud, it keeps your settings in step across your devices, and “Backup & Restore” writes them, along with your field selection and presets, to a file.
Try it
You can set the position, size, font, background and the fields of the free groups, such as Date & time, Camera, Lens and Exposure, without Pro. The Description, Location, IPTC, DNG, XMP, IPTC Extension, Canon and Nikon groups, as well as your own presets, are part of PhotoView Pro. Try them on your own photos with the free 7-day Pro trial; Pro is a one-time purchase for iPhone, iPad and Mac (see Try before you buy, buy once, yours forever).


Questions are answered in the PhotoView user guide, and you’ll find my contact details on the contact page.
← Back to the blog